Now, it’s time to install WordPress. But you may be wondering what exactly WordPress is and why you need it for your website. So let me touch on that briefly and then I’ll move onto how to install WordPress (specifically if you’re on A2 Hosting).
This post is part of a 14-step series on creating a website for your band using WordPress. Click here to go back to the main page.
What is WordPress & Why Should I Use It (vs. Other Web Builders)?
WordPress is a Content Management System (CMS) that allows you to create pages for your website, edit settings, upload media, and so on. It is the backend of your website. It’s essentially a website builder for your site.
You could, of course, build a website without using a CMS but for most websites, this would be rather difficult (especially if you don’t have any coding experience) and a major pain in the ass when updating your site.
There are a bunch of different Content Management Systems out there like Joomla and Drupal or more e-commerce specific one like Shopify.
WordPress is the CMS I am personally most experienced in and is always the one I recommend to people looking to build a website. It’s easily the most popular of all of them and one of the most user-friendly. It also offers the most flexibility as far as expanding your needs. It’s easy to add extra functionality, simply by buying a plugin (or downloading a free one) and installing it. Much like a VST plugin if you are familiar with recording software.
To use WordPress, you will first need to install it, let me show you how to do that…

How to Install WordPress on A2 Hosting
This section of the tutorial assumes you went with my number one recommendation for web hosting, A2 Hosting.
First, login into your A2 Hosting account. This will bring you to your account page. Once there, locate your hosting package and click on the login to the right:

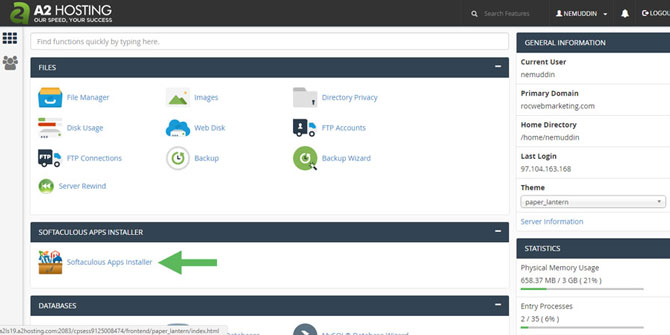
This will log you into your cPanel for your hosting plan. The cPanel is basically the backend for your hosting plan. This is where you can install WordPress, create emails at your domain (web address), etc. However, once you have WordPress installed, you likely won’t need to log into this very often, as you will be making all the changes to your website on the WordPress backend of your site.
Anyways, once here, locate the “Softaculous Apps Installer” and click on it:
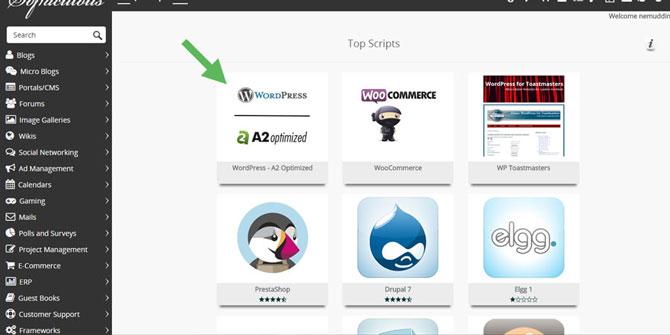
This will bring you to a new page that lists different Content Management Systems you can install. Find WordPress (likely the first box) and click on it:
This will bring you to a new page where you can set the options for your new WordPress install:
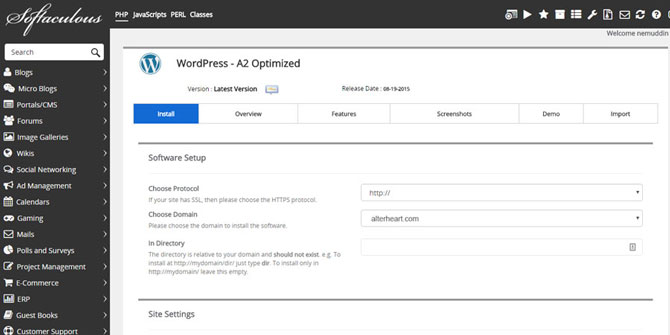
Here’s a breakdown of the different options:
Choose Protocol. This will be how your website appears in a website browser search bar. You can choose whether you want it to show up with “www.” included or without it.
Choose Domain. Choose the domain (your website) where you want to install WordPress. If you only have one domain, you should only see that one domain listed.
In Directory. Leave this blank.
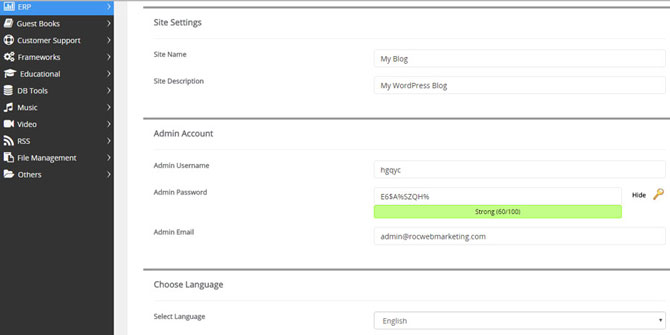
Site Name. Name your site. This should be your band name.
Site Description. Here you can put a short tagline of your site. You might put something like “the official website of …” or “AC/DC Cover Band in Pittsburgh, PA”. Whatever you want. Make it short and concise (the combination of your band name and this description should be under roughly 70 characters). This will show up in a Google search result when someone searches your band.
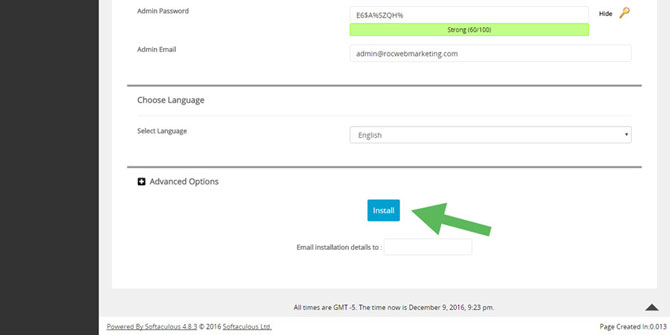
After that, you will see an option for “Admin Password” and “Admin Email”. These will be used to login to the backend of WordPress on your website. So be sure the create a strong password that you can remember. Also, note that the “Admin Email” will act as your username.
Once you fill these out, click “Install”. The app will begin installing WordPress. This can take a few minutes but once complete, you should be navigated to the login screen for the backend of WordPress on your site. If not, or to just log into the WordPress backend of your site, type your website into the browser bar with “/wp-admin” (for instance, www.example.com/wp-admin). This will bring you to the login page for your site.
Then, that’s it! WordPress is installed and you’re ready to move on.
Now, let’s move onto to Step 4: Picking a Theme for Your Band Website.
Or, click here to head back to the main page.
