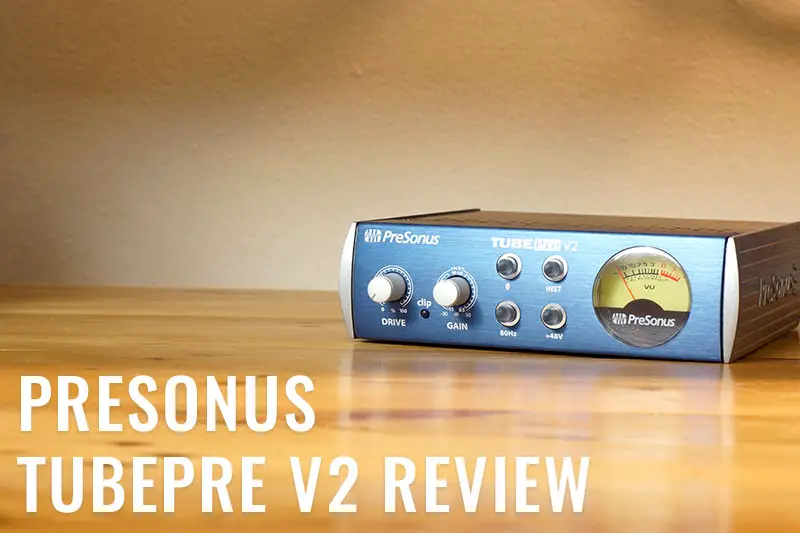
I’ve had the Presonus TubePre V2 for a few weeks now and in that time, I’ve been demoing the unit and recording clips for you guys to hear the difference the unit makes when recording at home.
If you’re unfamiliar, the TubePre V2 is a one-channel tube preamp which runs for about $130 new. Although it’s only a one-channel preamp, it has the ability to be used with a microphone or with a hi-z instrument input (like that from a guitar or bass).
In this review, I cover the unboxing of the unit, build quality, features, and provide vocal and guitar samples recorded through the TubePre V2 at different drive settings so you can hear the difference it makes and decide whether or not the unit is right for you.
So without any further ado, let’s get to it:
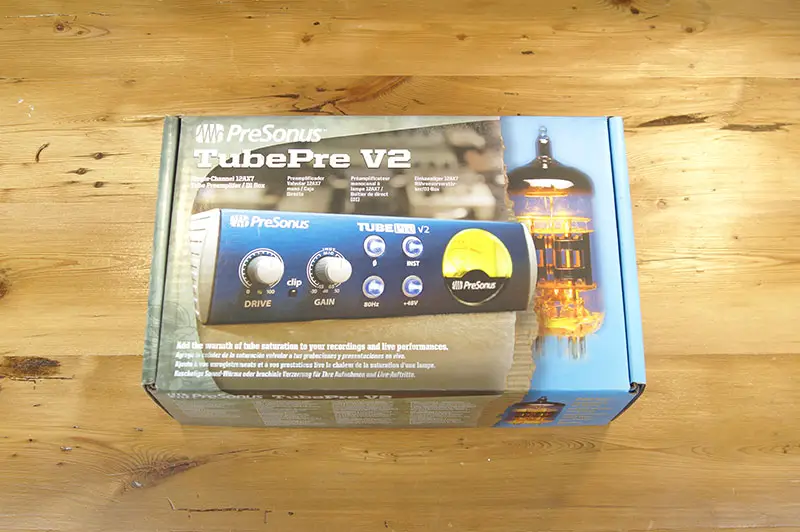
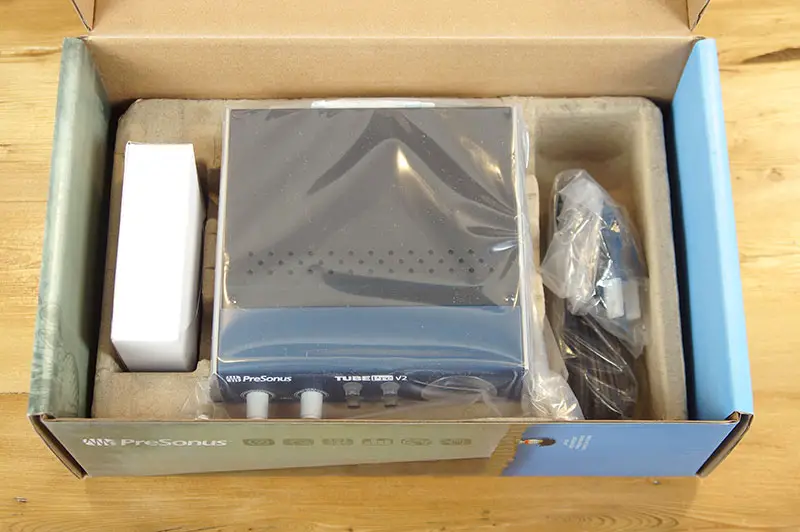
Unboxing the Presonus TubePre V2
As always, below are a few pictures of the unboxing so you can see what you’re getting:


Build Quality & Features of the TubePre V2
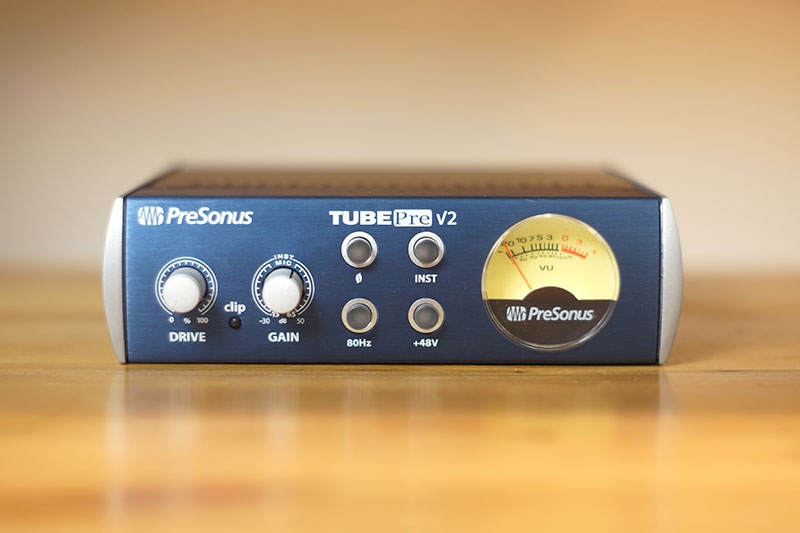
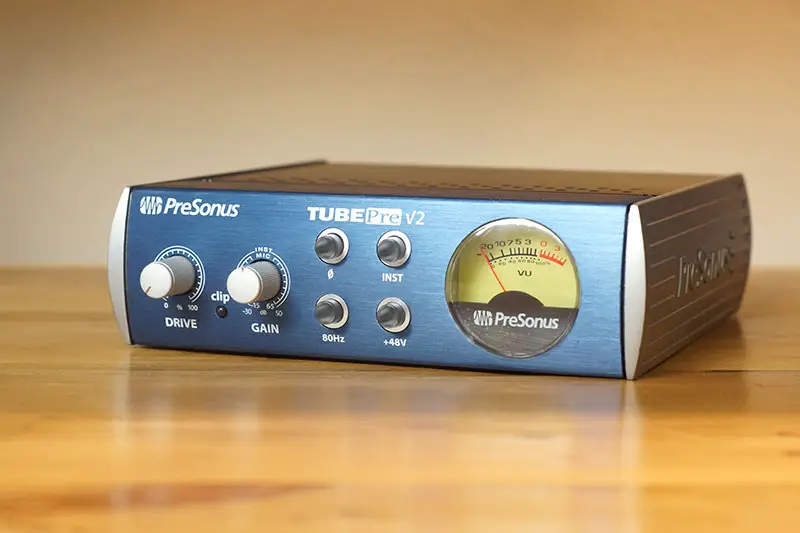
The TubePre V2 is housed in an entire metal case. It feels solid and seems like it could take a few bumps and bruises.
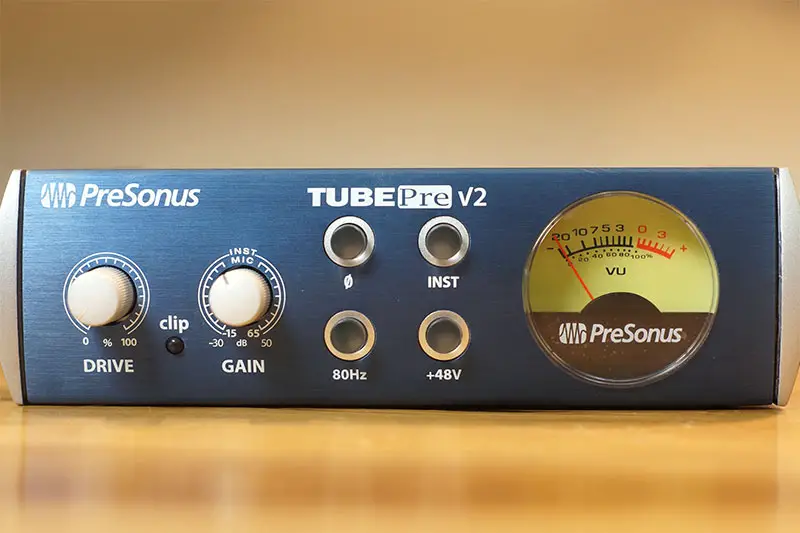
The TubePre V2 has a fairly simple interface with two knobs and four push in/out buttons on the face of the unit. The first knob sets the amount of drive (or saturation) for the track. The second is the gain level knob to set your recording level.
The first knob sets the amount of drive (or saturation) for the track. The second is the gain level knob to set your recording level.
The first button (at the top left corner) is a polarity switch. This can be used to correct phase issues so you don’t have to do it later in your DAW. The second button activates the instrument input. You’d push this button in to record into the unit’s instrument input (on the back of the TubePre V2).
The third button is a high-pass filter cutting out frequencies below 80hz. And the last button provides 48v of power for microphones that require phantom power, such as large diaphragm condenser microphones.
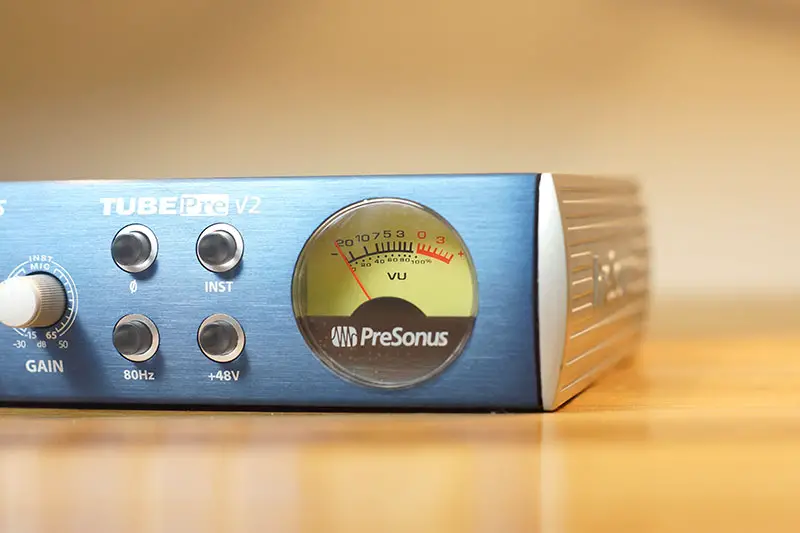
Lastly, is the VU meter which allows you to monitor the recording signal.
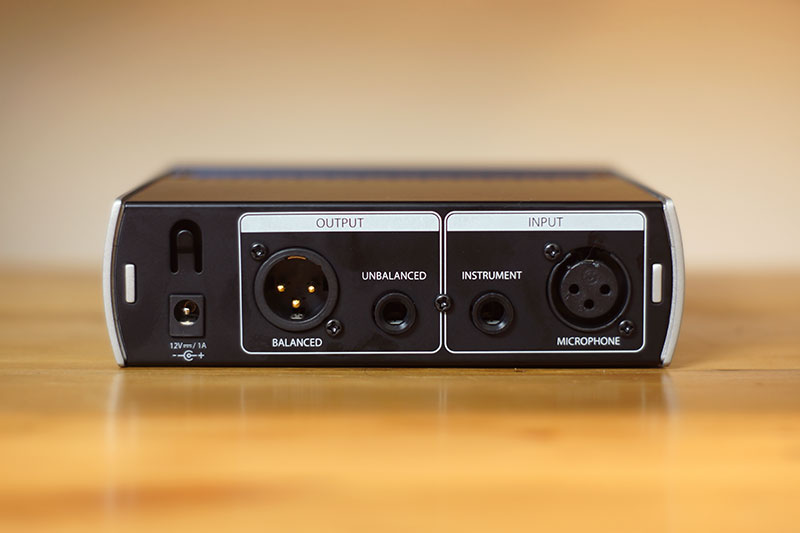
On the back is, of course, the power input along with two inputs and two outputs (with XLR and 1/4″ connections for each).
How Does the TubePre V2 Sound?
Now, onto the question you really want to know. How does the TubePre V2 sound and what type of effect will it have on your tracks?
To test this, I’ve provided a few vocal and guitar samples at different drive levels on the TubePre V2.
In this test, I recorded my vocals and guitar straight into my audio interface. Then, I sent the recorded track to an output on my audio interface, into a Radial Reamp box, out the reamp box, into the TubePre V2, and into an input on my audio interface.
This is not the traditional way to use the TubePre V2 but this allowed me to run the exact same audio track through the tube preamp with each pass on a different drive setting.
I figured this would give a more accurate comparison rather than if I did four separate takes through the TubePre V2.
Anyways, you can check out the vocal and guitar samples in the following video and SoundCloud clips. If you want to download the clips for yourself to compare them in your DAW, you can do so via the SoundCloud player (by clicking each tracking and then clicking the download icon).
Conclusion
Overall, the TubePre V2 is solid and feels like it can stand up to a bit of abuse. This was my first time messing around with a tube preamp, having previously always recorded vocals or guitar straight into my audio interface. So it was interesting to hear the difference the tube preamp can make and the amount of saturation/distortion it can provide.
For you, though, it’s ultimately a matter of preference on whether this piece of gear is right for you. So if you haven’t already, be sure to check out the video (and sound clips) to hear how to unit reacts and if it’s something you’d like to use to add saturation to your recordings.
Well, that’s all I have on the Presonus TubePre V2. If you have any questions, leave them in the comments below and I’ll do my best to answer them. As always, thanks for reading!