In this post, I’m going to show you how you can track visits on your website (and a bunch of other visitor behavior) using Google Analytics. I’ll show you how to set up Google Analytics, add the tracking code to your website, and start tracking visitors. Best of all, using Google Analytics is free!
Let’s start with creating your Google Analytics account:
This post is part of a 14-step series on creating a website for your band using WordPress. Click here to go back to the main page.
Setting Up Google Analytics
First, navigate to Analytics.Google.com. Then, sign in to start the process. You’ll need a Gmail or Google account. So if you don’t have either of these, you’ll need to create one.

Once signed up, you’ll need to create a new account for your Google Analytics property. Navigate to the “Admin” section and click the drop down box under “Account”. At the bottom of this drop down, click “Create new account”:
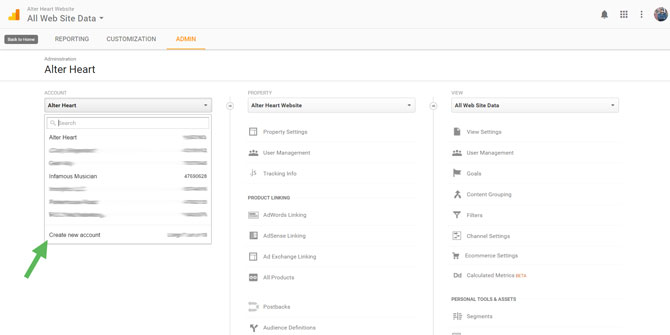

I have multiple Google Analytics accounts for all the different websites I have. If this is your first time setting this up, this drop down should be empty.
From there, you’ll be directed to a new page:
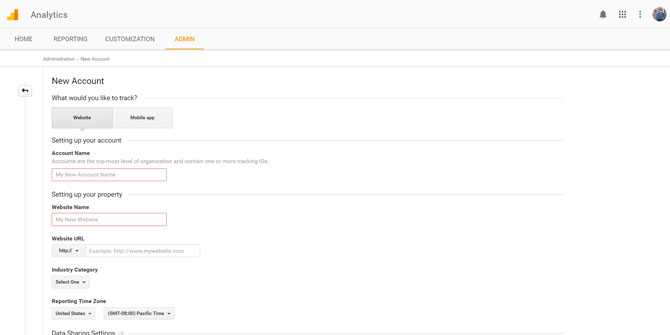
Here you can name the account, add your website name, and website URL (your domain). Scrolling further down you will see a few more options:
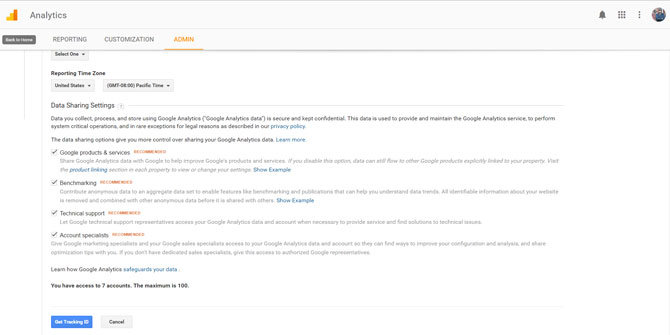
You can elect to include or exclude some of these selections. This is entirely up to you. Either way, you should still get immense value from Google Analytics.
Once you’ve filled out all the required areas, click “Get Tracking ID”. You’ll then be directed to a page with your tracking ID. You will need to copy the entire code inside the “Website tracking” box:
![]()
If for any reason you are not directed to this page, or you simply need to find the code again, you can click the “Admin” tab and then “Tracking Info” to get back to the above page:
![]()
With the code copied, head back over to the WordPress backend of your site. Then, go to your theme settings. In this tutorial series, we’ve been using the FWRD Theme, so I’ll use that as the following example.
In the FWRD settings area, click “General Settings”. Once you’re on the General Settings page, you should see a large input box under the title, “Custom Javascript”:
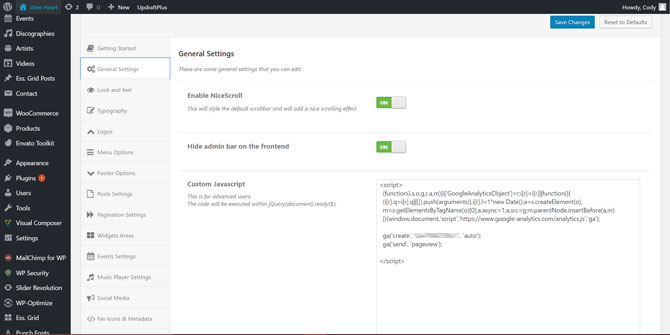
Paste the code into this box and hit save. That’s it! Your site is set up to begin tracking visits and other behavior information with Google Analytics. I’m not going to get into everything that Google Analytics can do (you’ll have to explore that more if you like) but this tool is extremely helpful in evaluating your traffic. You can see how many visits you’re getting, where they’re coming from, what pages they’re visiting on your website, how long they stay, and so on.
Well, this is the last post in this how-to series on setting up a website for your band with WordPress. I hope you enjoyed it and found it useful. If you have any questions, leave them in the comments below and I’ll do my best to answer. Otherwise, thanks for reading!
Click here to head back to the main page.
