I’ve played enough bars, clubs, and rehearsals where I can’t hear myself play to the point where I’m pretty much over monitoring through PA speakers and floor wedges. It’s a scary moment when you play your first song live on stage and you can’t hear yourself.
I’ve had this happen multiple times and it’s not a lot of fun. You mess up and end up struggling to hear yourself the entire night.
This is a big reason as to why I decided to go to in-ears (playing to a click track and playing with backing tracks contributed to that as well). But, using in-ear monitors gives you the control over your mix and with a proper mix set, and a proper system, you shouldn’t have to worry about hearing yourself ever again.
I’ve been using a budget wireless monitor system for the past few months, and while I’ve been able to make due, the constant unreliability and number of pops, clicks, dropouts, etc. have caused me to look for a better unit.
Bring in the Audio-Technica M2 Wireless Monitor System.
I’ve been looking for a new wireless monitor system for a little while now and Audio-Technica was kind enough to send out their M2 system to test and review.
The unit retails for $600 new, and in this review, I cover the build quality, features, functionality, and overall quality of the M2 system so you can decide if it’s a good fit your you. I’ll even cover how to set it up and how I personally use the system at practice.

Using a wireless monitor system doesn’t have to be complicated, and I want to show relatively simple setup I have for using the M2.
So without any further delay, let’s get to it…
Use the links below to “jump” to each section (or just scroll down):
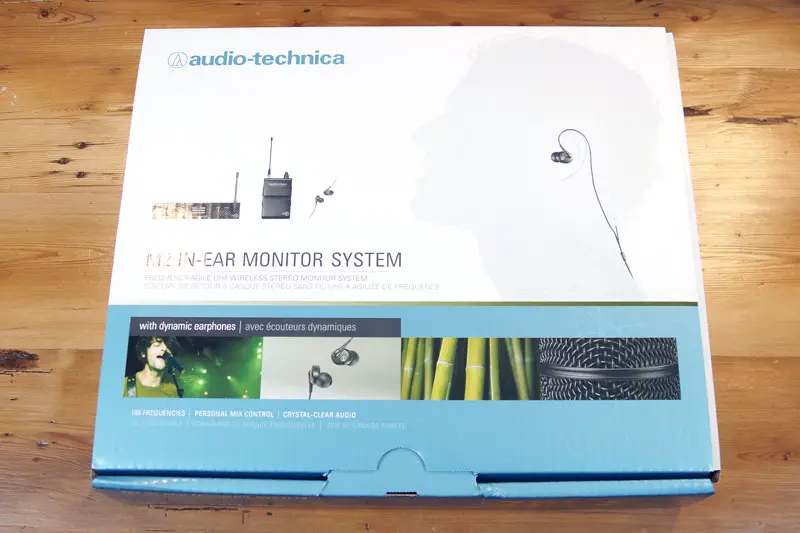
Unboxing the Audio-Technica M2 Wireless Monitor System
Fairly standard stuff on the unboxing of the M2 system. But, I included some pics below in case you’re into that kind of thing:
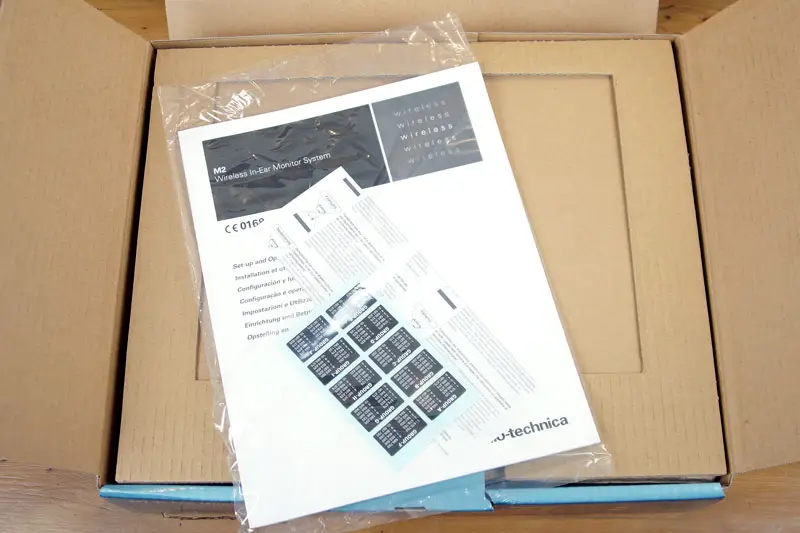

The Audio-Technica M2 comes with:
- The M2 wireless system
- One receiver pack
- One set of in-ear monitors/headphones with an accompanying small carry bag
- One set of foam ear tips
- One set of rack ears (the systems takes up 1/2 of one rack space) and screws to attach the ears to the system
- One set of feet and screws for the bottom of the M2 system (if you decide not to rack mount it)
- One 10″ 1/8″ male to female extension cable
Build Quality & Features of the Audio-Technica M2
Now, let’s take a look at the build quality and some of the features of the M2, starting with the actual system and then moving onto everything else like the receiver pack.
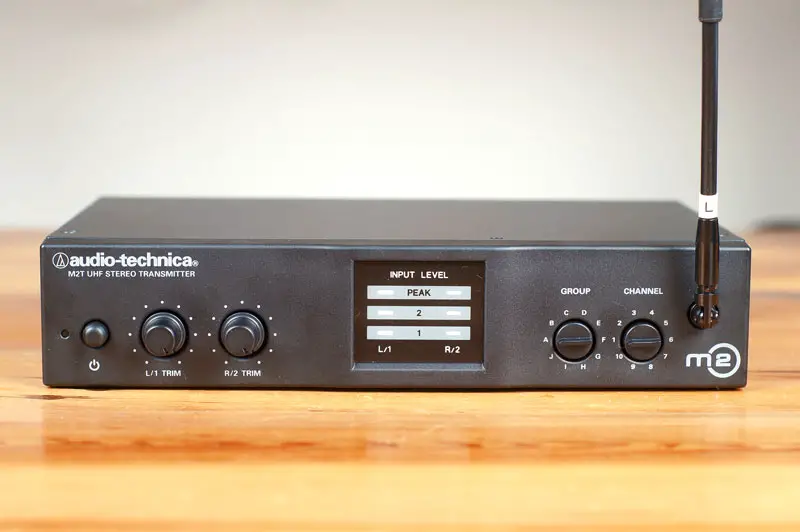
Most of the system is encased in metal with the actual face of the unit made of plastic.
On the front, there’s a simple push-in/push-out power button, two volume knobs (one for the right and left inputs, marked as “L/1 Trim” and “R/2 Trim”), an input level meter for both inputs, two knobs for setting the system’s frequency (labeled as “Group” and “Channel”), and an antenna.
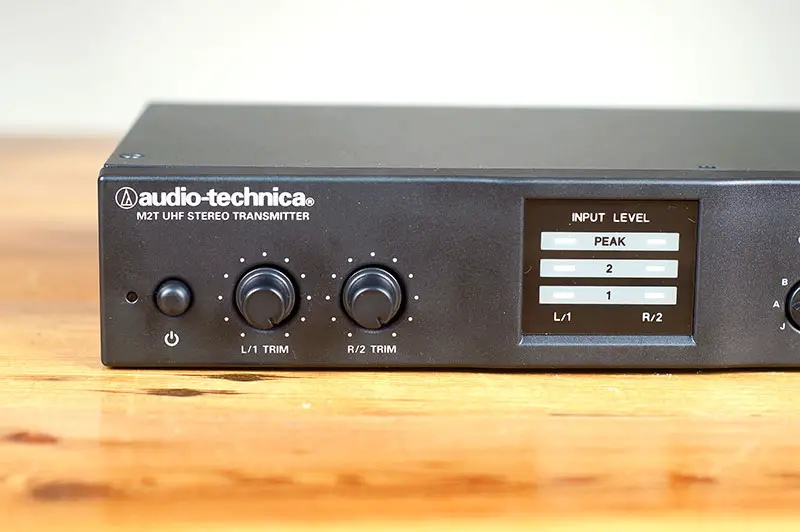
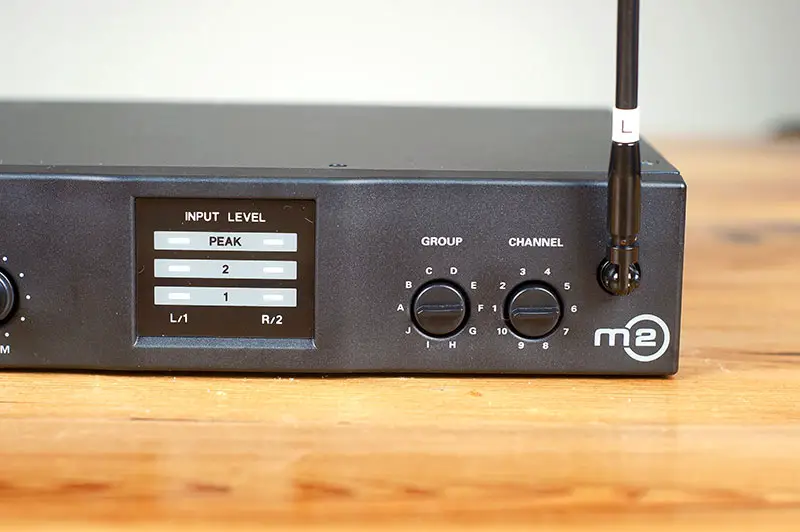
The first thing that sticks out to me with this placement is that the antenna is on the front of the unit. This is a nice plus if you do decide to put the unit in a rack space.
It seems obvious, but there are many systems that have the antenna on the back of the unit (like my Galaxy Audio As-1100).
In this case, the antenna takes up space in the back of the rack which can cause an issue when racking other gear above the unit. Some units counter this by allowing you to route the antenna to the front. But, this is cumbersome and obnoxious.
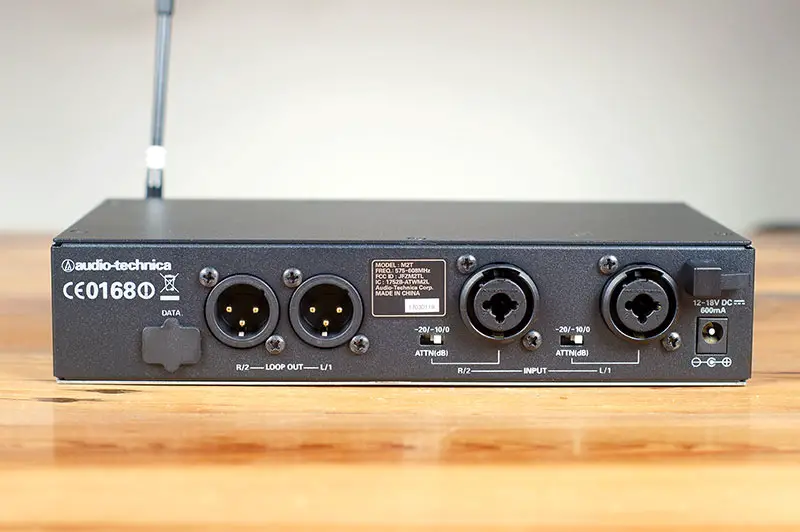
Moving onto the back of the unit, there are two XLR-1/4″ combo inputs (they’ll accept either an XLR or 1/4″ connection) for the left and right channels. Each of these inputs also have a switchable pad that you can use to tame a signal that’s a bit too hot, working in increments of 0 dB, -10 dB, and -20 db.

Of course, there’s also the power input with a small clip to loop the power cord around to it from being pulled out.
And lastly is a pair of right and left XLR outputs, labeled as “Loop Out”:
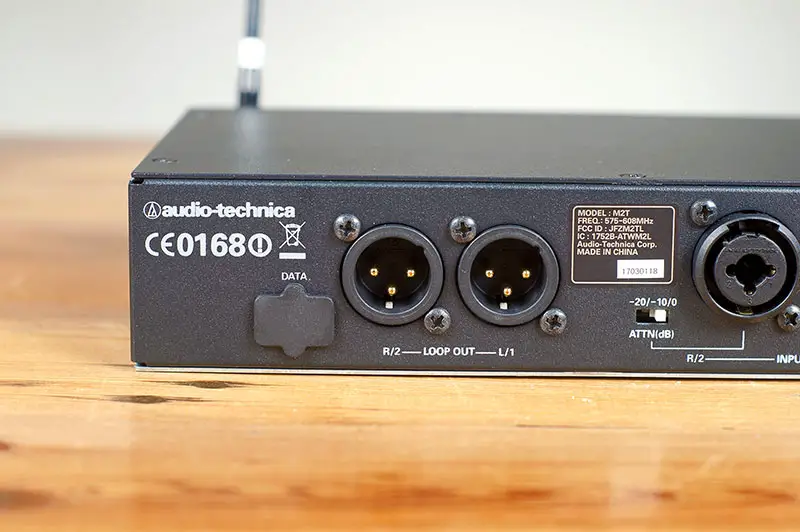
These outputs allow you to send the same signal, going into system’s inputs, out to another source. This gives you some routing flexibility. For example, you can chain a group of M2 monitor systems together. You’d essentially route into the input of one system, out the Loop Out, and straight into the input of another system.
This way, if you have limited outputs on your interface or mixer, you can still set up multiple wireless systems. All of these systems would then be on the same monitor mix.
The data port is for factory use only.
Now, let’s take a look at the receiver pack:

First off, the receiver pack is made of plastic. It seems well made, and clip on the back is made of metal, but I’d appreciate it if the entire pack was made of metal. But, this seems to be pretty standard for receiver packs from other systems in this price range.
Starting with the top, the receiver includes a volume/power knob (the unit is powered on by turning the knob). This knob also includes a wider knob just below the volume adjustment that will allow you to pan your in-ear mix completely to the left or right and everywhere in between.
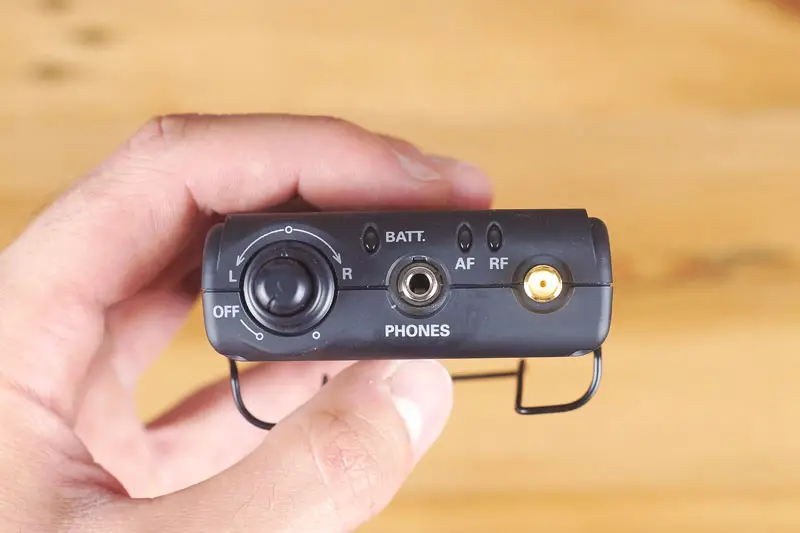
When using this feature, if you dial the knob all the way to the left, you will only hear the left side of the mix and your left headphone only. The same is true when panning to the right.
This is helpful to check where certain instruments are located in your in-ear mix. You could also use it to adjust your monitor mix. For example, if vocals were panned more to the left in your mix and guitar more in the right, you could adjust this knob to hear more vocals or guitar.
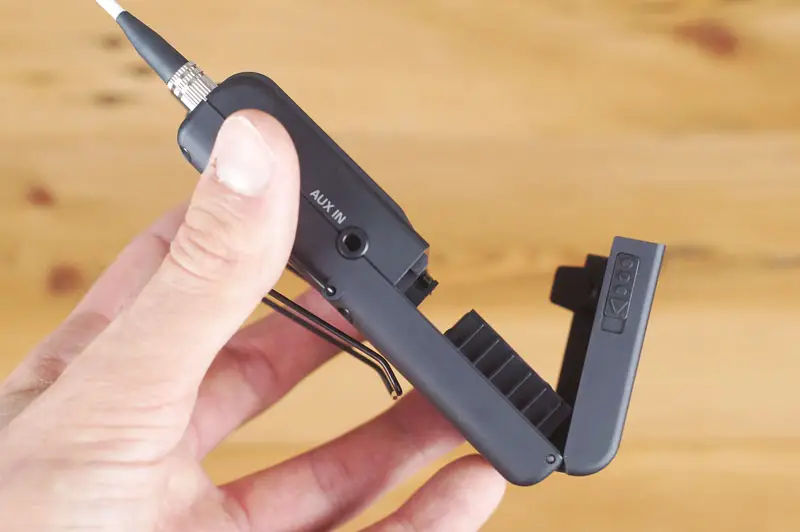
Moving on, there’s the headphone 1/8″ input. A unique feature to this input is that the included headphones can be screwed into this input to keep them from coming loose. There is a thread on the input and a thumbnail screw attached to the headphones:
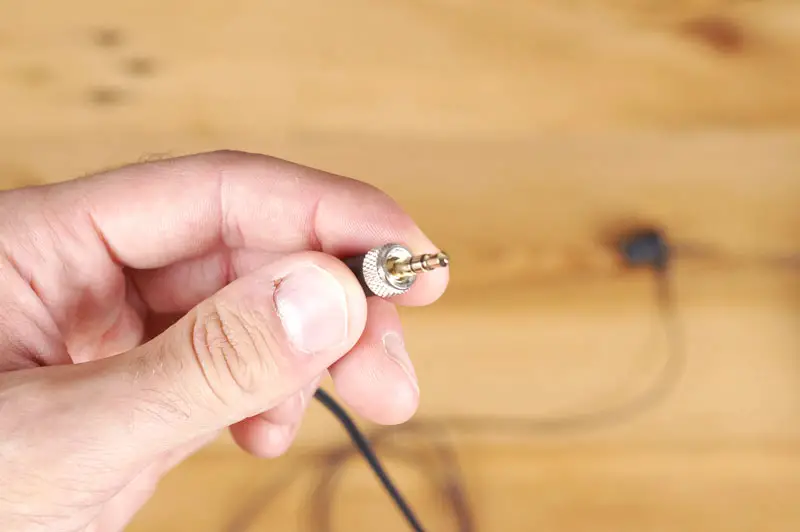
While this feature is nice, it only works with the included headphones. So if you use your own in-ear monitors, it will provide no advantage to you.
On the top of the M2 receiver is also an led to indicate the battery level. The led marked “AF” will light orange when the receiver is at peak volume. The led marked “RF” indicates when the receiver is receiving a signal from the transmitter (the M2 system).
Lastly is the antenna, which simply screws on:
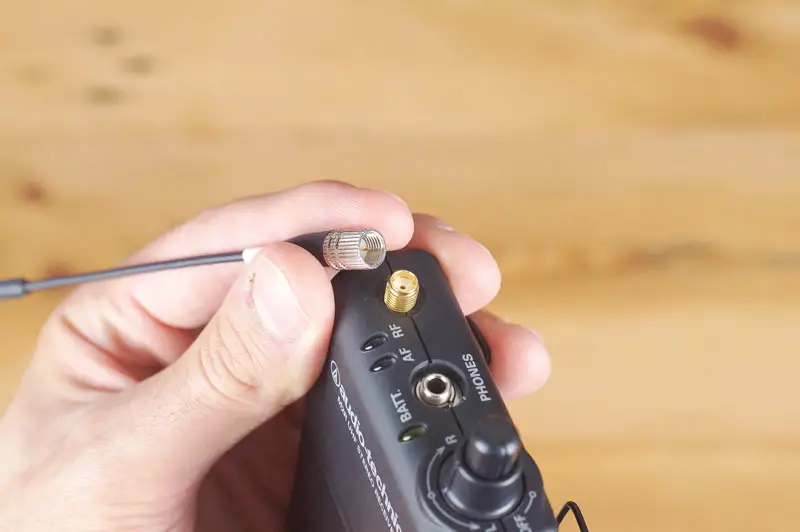
The antenna is not bendable. It is a bit flexible, though.
On one side of the unit is an Aux In. This could be used to connect an MP3 player to the unit.
On both sides of the receiver is a switch. By pressing both of these switches down at the same time, you can open up the receiver pack:
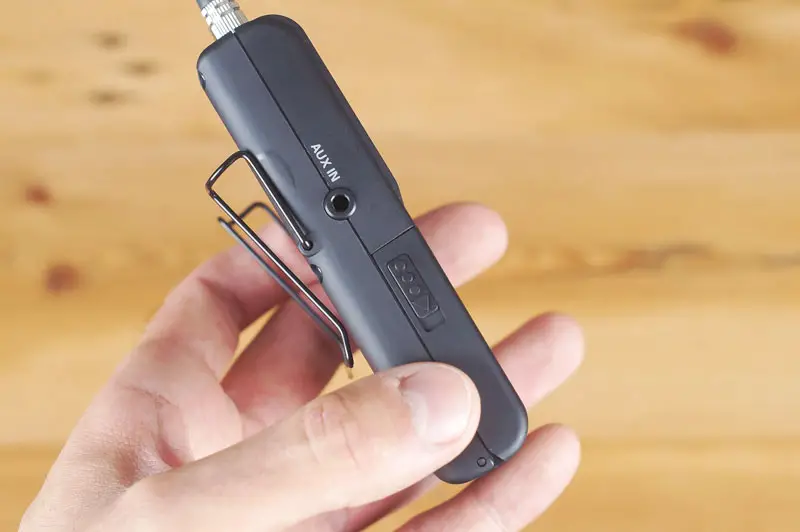
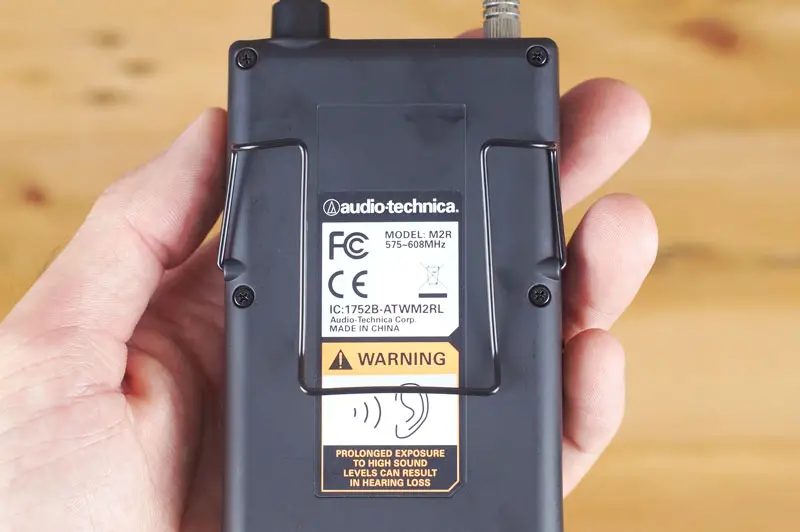
On the back is a metal clip for attaching the pack to your belt or pocket:
On the inside of the receiver is space for two AA batteries. There are also two inset dials for adjusting the frequency of the pack. To adjust these, you need to use a small flat head screwdriver (made of plastic) which is included inside the pack.
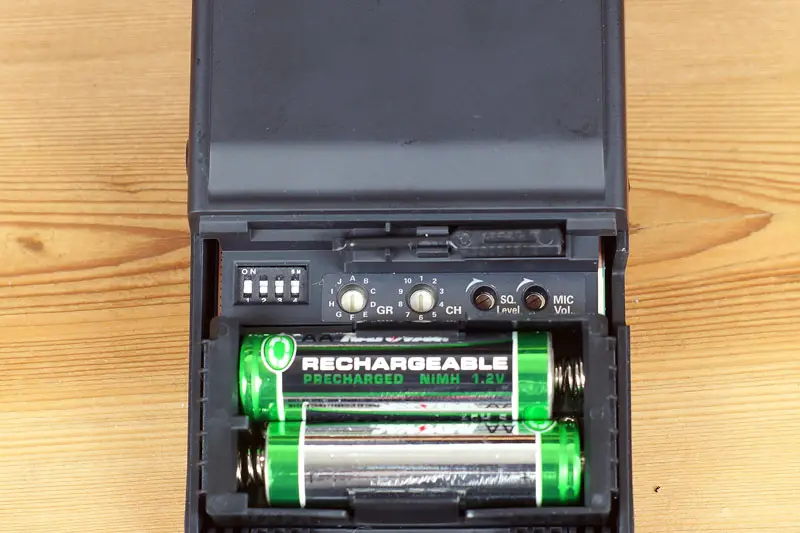
Tip: I’d recommend purchasing a few sets of AA rechargeable batteries and keeping them on hand in case the batteries die. That goes for any wireless system and receiver pack you use. The battery length isn’t bad on the M2 receiver. It’s just good practice :).
The inset dial marked “SQ” is the squelch adjustment. This can be adjusted to reduce background RF noise. The inset dial marked “MIC” can be used the adjust the level of the Aux In.
Lastly, there are the four tiny “DIP” switches in the top left corner. Each of these switches controls a different function. The first turns on or off the pack’s limiter (keep it on to protect your hearing). The second allows you to set the headphone out to stereo or mix (which mixs the left and right inputs into both headphones).
The third switch changes the Aux In from microphone to line level. And the fourth switch changes the headphone out from stereo to mono.
In case you forgot any of these, there is a little diagram on the back of the battery cover that identifies each of these switches.
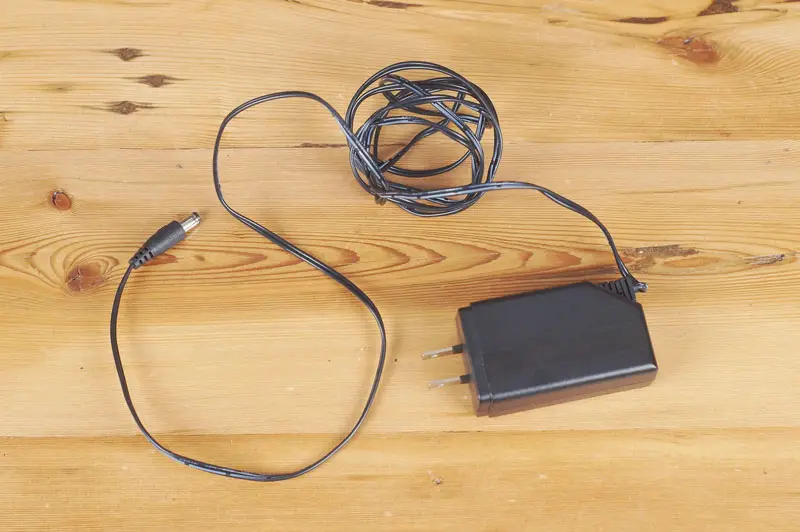
Also included with the system is, of course, the power cord at 6 ft. long:
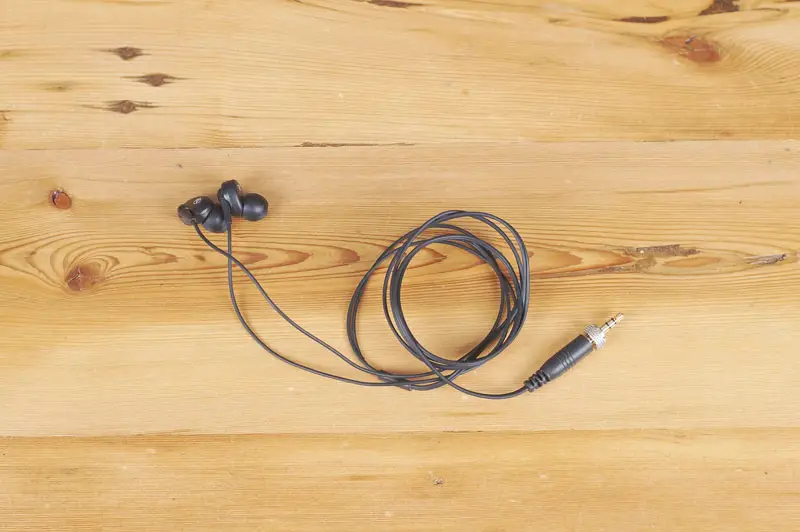
And the included in-ear monitors:
The package also includes rack ears if you’d like to rack the unit and feet that can be added to the bottom of the system if you decide to no put it in a rack.
How to Use the M2 Monitor System (& Other Wireless Monitor Systems)
I’m not going to cover every possible use case for using wireless monitor systems. There are a bunch of different ways to use and set them up. But, I do want to show you how I have the M2 setup and how I use the system with my band at rehearsals.
I have a fairly basic setup but I believe it’s a comparable one that most bands can use.
Basically, at practice and when playing out live, I use my laptop loaded with Presonus Studio One to play backing tracks (such as strings parts since we don’t have a violin player in the band) and to play to a click track.
To run audio in and out of my computer, I’m using a small 4-input audio interface by Behringer, the UMC404HD (which is only $100). This interface allows me to plug my guitar straight into one of the inputs. I can then arm a track in Studio One so I can monitor my guitar.
I do the same thing for bass and vocals. I don’t really need to do this for drums as we can all hear drums quite cleary even when using in-ears (none of us are using custom molds).
This setup works fine at practice. When playing out live, a splitter cable needs to be used to send a signal from, let’s say for example my guitar, to the interface and to the front of house (FOH).
Anyways, on the back of the UMC404 HD are 3 pairs of outputs (6 1/4″ outs in total):
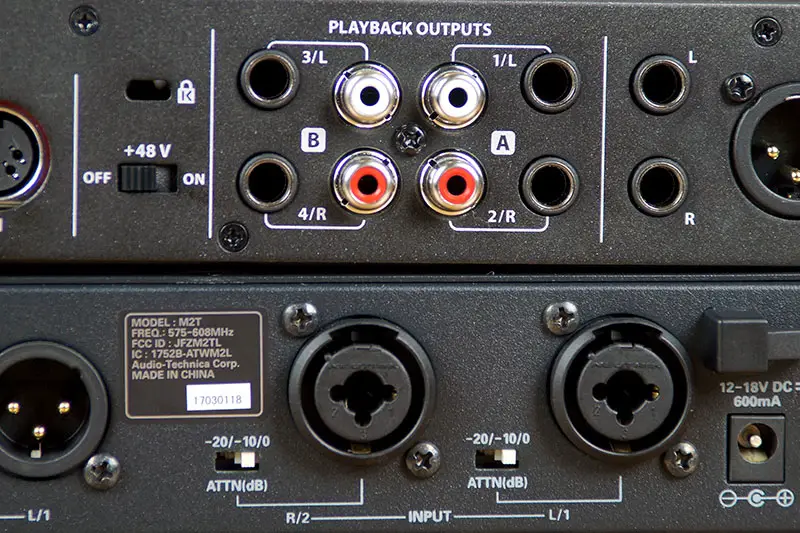
The 1/4″ outputs to the far right in the image above are the interface’s main outs (these output the main mix).
Under “Playback Outputs”, there are a few additional outputs. The outputs labeled “1/L” and “2/R” are a duplicate of the main outputs (again, the main mix). The outputs labeled “3/L” and “4/R” are additional outputs that can be used to output a separate mix from the main mix.
All of these outputs function as stereo pairs.
Since we play to a click track, having multiple outputs is essential. I need to send the main mix to a mixer to give sound for the backing tracks. But, I don’t want a click playing over this.
So from the “3 + 4” outputs on the UMC404HD, I plug straight into the inputs on the M2:
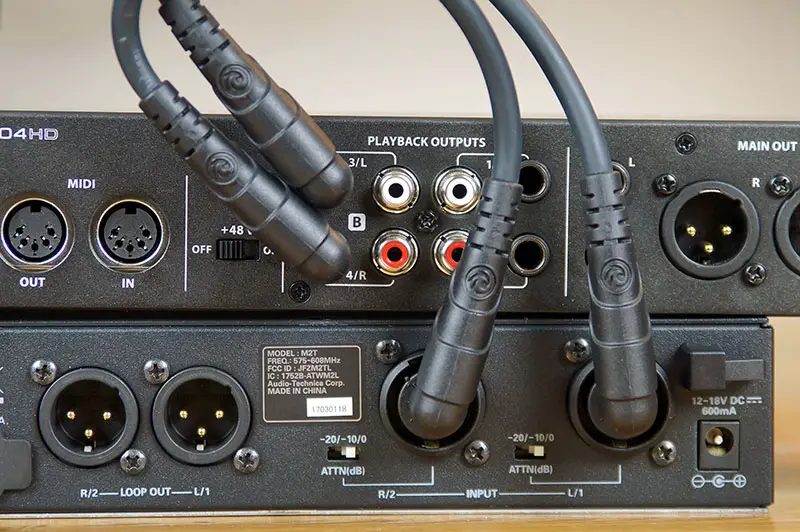
This gives me the mix going out outputs “3 + 4” in my wireless in-ears. Then, I just have to setup Studio One so that only these outputs have a click track and the main outs (“1 + 2”) do not. I can also adjust the volumes for any track for each of this mixes independently.
Thus, creating a monitor mix with outputs “3 + 4” and a mix I can send to the FOH sound guy via outputs “1 + 2”.
I’m the only one using wireless in-ears in my band at the moment. But, other members are soon to follow.
In the meantime, everyone else uses wired in-ears. For this, I just plug a stereo 1/4″ cable into the headphone output on the front of the Behringer UMC404HD and then plug the other end into a Behringer 4-output headphone amp.
This allows the other guys to use their wired in-ears and set the volume of their mix independently.
The UMC404HD has a push button on the front of the unit to toggle between the “1 + 2” mix and the “3 + 4” mix. I have this set to the “3 + 4” position so everyone else is on the same mix as me and can hear the click track.
I know that took awhile to explain but I wanted to make sure it was as clear as possible. I know when you’re first getting started using in-ears, the setup process and how you use them can be a bit confusing. So hopefully that gives you at least one way try out with your band.
Once everyone else in the group moves to wireless systems, there are a few options. I can daisy chain the M2 systems together using the outputs on the back of the units. One M2 system would plug into another and so on. In this case, everyone would be on the same mix as they are now, only wireless now.
If everyone wants their own monitor mix (for example, the bass player wants their mix to have the bass turned up but I want my mix to have the guitar a bit louder), then I’d need to invest in a larger audio interface. One that has more outputs, like the Behringer UMC1820.
This way everyone could have their own monitor mix. Outputs “3 + 4” would go to one wireless monitor system, outputs “5 + 6” would go to another, and so on.
Then, in Studio One, I could set the levels of the different instruments for each mix. It would be more work for myself as the band’s “sound guy” but it does give a better monitoring experience for everyone. We all want to be able to hear ourselves clearly. So this will be the route we go with in the near future.
How Does the Audio-Technica M2 Work?
Finally, the ultimate question, how does the Audio-Technica M2 work?
Overall, I’m very happy with the performance of the M2 system. You really do get what you pay for when going with a system like this. While the M2 is not the cheapest option out there, it’s also not the most expensive, and I think it’s in a good range to get a reliable system.
From my tests, both at home and at practice, the M2 provided consistent sound. There were no clicks, loud pops, or any of that kind of interference. Which to me, was awesome having previously been using the Galaxy Audio AS-1110 (which is only $200 less than the M2) and had it experience all of this issues. It was just straight up terrible and unusable when trying to monitor in stereo.
Anyways, the M2 is miles better. It is much more reliable and I don’t experience any pops, clicks, or dropouts, during practice.
The only thing I’ve noticed is a bit of constant hiss. But, this is only really noticeable when the volume is turned all the way down on the receiver pack. When music is actually playing, or when playing your instrument, it’s not very noticeable.
The system claims to have a range of 300 ft. (with a clear signal and no interference).
Testing the range myself, I walked out my apartment and counted approximately how many yards before the unit started to break up. I heard one or two clicks in the 25 to 50-yard range (75 to 150 ft.). There was some more interference at about the 80-yard (240 ft.) range and complete drop out at about 150 yards (450 ft.).
I won’t ever need to play anywhere near that far away from the system but it’s nice to know that it has that far of a range. In almost all cases, it’s going to be on-stage from me, so it’ll only be about 10 to 15 ft. away. Maybe 30 ft. to 50 ft. if we ever get the chance to play a pretty large venue.
In that range, I haven’t experienced any issues, dropouts, etc.
Lastly, I haven’t touched a whole lot on audio quality as I believe when using a reliable system, the audio quality has more to do with the actual monitors/headphones you are using. With that said, I do believe the M2 provides a clear, true signal allowing you to hear your mix as you should.
This system does come with a pair of in-ear monitors, but like most in-ear monitors that come included with in-ear systems, they aren’t very good. Overall, the sound of the included in-ear monitors is compressed and lacks dynamic range. The earbuds are also very small and at least for me, don’t fit my ears very well (they don’t seal my ear canal well).
Audio-Technica did send a pair of their ATH-E40 in-ear monitors (which are for sale separately from this unit) and I wrote up a full review on those monitors which you can check out here.
Conclusion: Is the M2 a Reliable Wireless Monitor System?
Simply, yes. The M2 is very reliable, and I like said, at practice, I don’t hear any pops, click, or any other kind of disturbances. I get a clear, uninterrupted signal to hear my mix, which is exactly what a monitor system should do.
The only real con was that there was a bit of constant hiss when nothing is playing through the receiver pack, but again, this not very noticeable when music is playing.
I’ve also read other reviews for this system, with a few mentioning that the system/receiver pack didn’t go loud enough. To address that concern, the M2 is more than loud enough to use on stage and with loud bandmates. If I were to turn the receiver pack to full volume, my ears would probably bleed.
So if you have a problem with volume on the M2 system, it likely has something to do with your audio signal and the way you’ve routed sound to the system or the in-ear monitors you are using aren’t providing a sufficient seal.
As with most things, you get what you pay for. While the M2 is the cheapest system, it’s definitely worth the money to get a system that is reliable. Being able to hear yourself while you play is important and this system will help you do just that.
That’s all I have for you in this review. I know it was a long one but I hope you found it useful and if you do have any questions, be sure to leave them in the comments below and I’ll do my best to answer them as thoroughly and promptly as I can.
Thanks for reading!