Vocals are largely considered to be the most important aspect of any recording, so it is integral for every recording artist and producer to do everything in their power to obtain the highest quality vocal recordings possible.
In this article, we’ll cover some of the best microphones you can use to record killer vocals at home plus discuss the logistics and recording techniques that will help ensure your vocal takes are as good as they can possibly be.
Table Of Contents
Choosing The Right Room
If you are reading this article, then you are most likely going to be using a home studio. There is absolutely nothing wrong with that, and there are plenty of ways to get amazing vocal takes in the comfort of your own home.
The most important aspect of this is selecting the right room to make your vocal recording area, and it may surprise you what parameters you should look for. A common mistake is that home studio producers will try to mimic a professional studio sound booth and use a tiny room without much stuff in it, like a closet.
In reality, studio booths are shaped differently than a standard closet or small room in a house, and it is covered in soundproofing equipment. The main issue facing home sound booths is the issue of reverb. If there isn’t enough padding, or if the room is too small and symmetrical, the sound will bounce all over the room, leading to subpar recording.
A term you will see a lot when it comes to vocal recording is ‘dead’ or ‘deaden,’ when talking about a sound booth. This simply means that there is as little reverb as possible. You can easily test this by walking around the potential recording place and clapping your hands, snapping your fingers, or talking. If you can hear the noise ring throughout the room, then you need to deaden it.

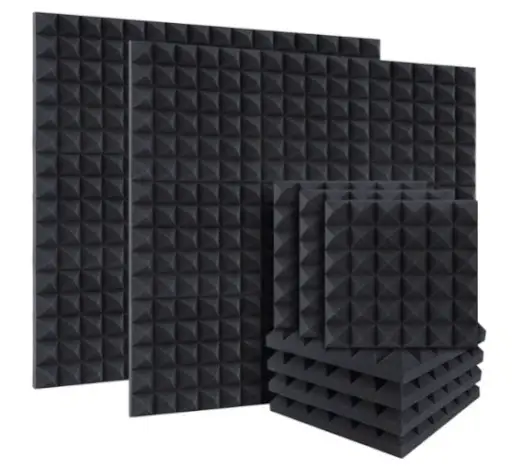
Soundproofing foam pads are great at what they do, which is why professional studios use them. You simply affix them to the walls of your sound booth and you will immediately have a much deader room.
That said, you can achieve great sounding vocal recordings without the foam pads. What ultimately deadens a room is stuff. Carpets, rugs, furniture and any other household objects will cut down on a room’s reverb.
It is, however, possible to create a space that is too dead. You don’t want a room to lose all of it’s sound entirely, or else your vocals may sound muffled. The beauty of adding things to absorb sound to your room is that they can be removed if needed. Ultimately, you will need to troubleshoot for a bit and find the perfect balance for your own room.
Microphones And Other Recording Equipment
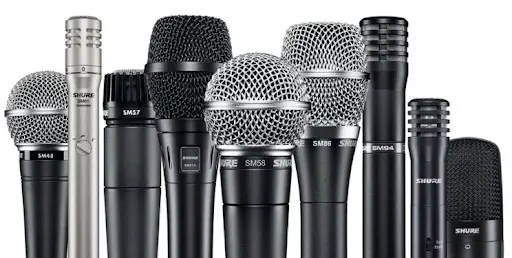
Obviously, the most important piece of gear when it comes to recording vocals is the microphone. But what kind of microphone do you need? For the majority of vocal recording you will need a condenser microphone.
The two main types of microphones are dynamic and condenser, and as you’d expect, both thrive in different circumstances. Dynamic microphones are typically better in a live setting with higher gain inputs, such as electric guitar, drums, and loud vocals. Condensers are far more sensitive and are perfect for quieter inputs like most vocals, piano, and acoustic guitar.
When it comes to choosing a mic specifically for vocals, it now becomes a matter of genre. If you are a singer-songwriter or in an indie band, use a condenser. If you’re a heavy metal or hard rock singer, then a dynamic would be better, especially if there is screaming.
Another important component to consider is the size of the diaphragm (the component in a microphone that vibrates, detecting the sound). A large-diaphragm microphone will have a diaphragm 1” or bigger while a small-diaphragm mic will have one that is ½” or smaller. A large-diaphragm is better at picking up low-frequency sounds like a bass guitar or bass drum, while a small-diaphragm mic is better suited for a higher frequency input, such as a flute.
As far as additional audio electronics, there are only a handful of things you need before you are ready to start recording vocal takes. Aside from your computer with your chosen DAW (recording software), you will need a quality pair of closed-back headphones.
Closed-back headphones, as opposed to open-back, have a backing on the earmuffs that is not breathable. This means there is no airflow going through your headphones, which means you hear less room noise and less noise escapes from your headphones.
Being able to isolate your vocals is integral for a recording session. A pair of studio quality closed-back headphones will absolutely help you get a better take and hear your recordings that much more.

The other piece of gear you will need is an audio interface. Your microphone cable will go into the audio interface, which is connected to your computer. These interfaces typically have other inputs as well, meaning you can use an interface to record vocals and any other instrument that uses a ¼” cable.
Additionally, audio interfaces are great because they will almost always have a built-in preamp for your microphone input. The built-in preamps work just fine and you will not need to buy an external one unless you need top-level, professional sound.
8 Amazing Microphones To Purchase For Your Home Studio
| Image | Pros | Features | Price |
|---|---|---|---|
 | Perfect first microphone for a home studio. | 9.5 | View Price |
 | Excellent warmth in the mid-range, making it great for recording vocals and acoustic guitar.
| 9.5 | View Price |
 | Low-noise internal circuitry that doesn’t add any color, leaving you with tight and clean vocal takes. | 9.5 | View Price |
 | Known for its strong ability to cope with frequency changes and dynamic range. | 9.5 | View Price |
 | Avantone Pro Planar Open-Back Headphones Jack-of-all-trades microphone. | 9.5 | View Price |
 | Microphone with nine different pattern settings, allowing you total control over your vocal sound. | 9.5 | View Price |
 | Phenomenal, tried and tested legendary microphone that will only help you achieve excellent vocal takes. | 9.5 | View Price |
 | Incredible dynamic range at both high and low frequencies while allowing almost zero noise. | 9.5 | View Price |
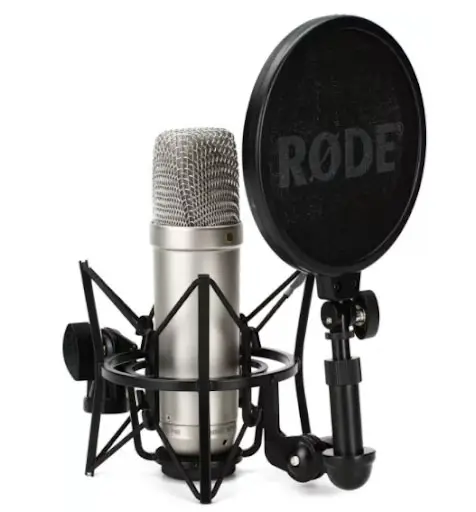
1. Rode Large-Diaphragm NT1-A Condenser Microphone
The Rode NT1-A is a perfect first microphone for a home studio. It is a large-diaphragm condenser mic, and is highly versatile. It will do great for vocals, acoustic guitar, bass guitar, and more.
As far as microphones go it is on the lower end in terms of price and quality (you get what you pay for), but it is an amazing value nonetheless. It comes in a great bundle that includes a cable, pop filter, and even a shock mount.
It may not have the top quality that high-end studios need, but it is a perfect and affordable way to begin building your home studio.
Key Specs
| Type: | Condenser |
| Diaphragm Size: | 1” (large) |
| Connection: | XLR |
| Color: | Silver |
| Warranty: | No |
| Special Features: | Low self-noise |
| Accessories: | Pop filter, shock mount, XLR cable, dust cover |
| Dimensions: | 15.25 in. W x 11 in. D x 4.5 in. H (387.4mm W x 279.4mm D x 114.3mm H) |
| Weight: | 11.5 oz (0.33 kg) |
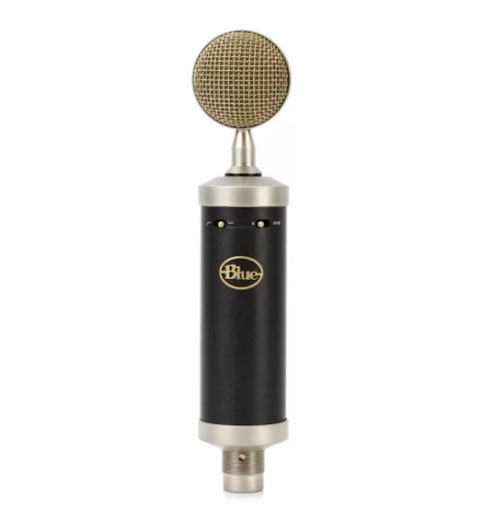
2. Blue Microphones Baby Bottle SL Large-Diaphragm Condenser Microphone
The Baby Bottle condenser microphone is as great of a tool as it is aesthetic. It has an awesome vintage look that is coupled with it’s famous vintage sound. It has excellent warmth in the mid-range, making it great for recording vocals and acoustic guitar.
This truly is a do-it-all microphone as it can even record drums surprisingly well. It is a versatile piece of equipment that would be extremely useful for any home studio. It is affordable as well, as far as microphones go, and comes with a shock mount and a cool wooden travel case.
Key Specs
| Type: | Condenser |
| Diaphragm Size: | 1” (large) |
| Connection: | XLR |
| Color: | Black |
| Warranty: | No |
| Special Features: | Stylized design, vintage warmth (particularly in mid-range frequencies) |
| Accessories: | Shock mount, wooden case |
| Dimensions: | 8 in. W x 3 in. D x 2 in. H (203.2mm W x 76.2mm D x 50.3mm H) |
| Weight: | 1.1 lb (0.49 kg) |
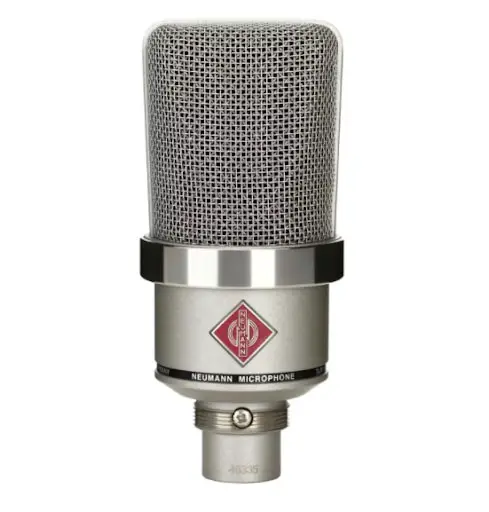
3. Neumann TLM 102 Large-Diaphragm Condenser Microphone
Like the Blue Baby Bottle, the Neumann TLM102 is an incredibly versatile microphone that can record a wide range of instruments at a quality level. It boasts the always strong Neumann name in a lovely, compact design that can easily fit into tight spots on a drum kit.
It features low-noise internal circuitry that doesn’t add any color, leaving you with tight and clean vocal takes. It is known for its high level of clarity, especially with vocal recording. It also comes with an always useful stand mount.
Key Specs
| Type: | Condenser |
| Diaphragm Size: | 1” (large) |
| Connection: | XLR |
| Color: | Nickel |
| Warranty: | No |
| Special Features: | Compact design and high level of versatility |
| Accessories: | Stand mount |
| Dimensions: | 9.8 in. W x 4.6 in. D x 2.6 in. H (248.92mm W x 116.84mm D x 66.04mm H) |
| Weight: | 1.5 lb (0.68 kg) |
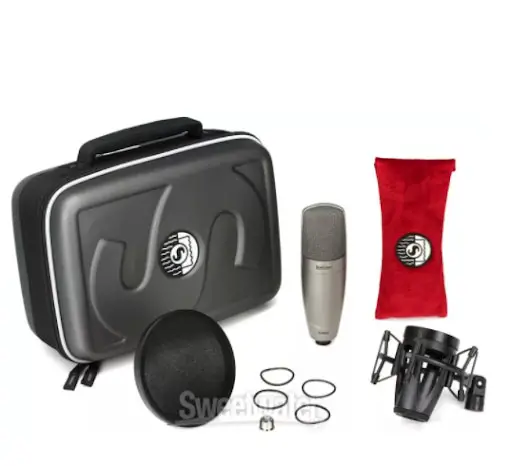
4. Shure KSM42/SG Large-Diaphragm Condenser Microphone
It is hard to find a better name in microphones than Shure, and the KSM42 is no exception. It’s a sleek and masterfully constructed piece of equipment that will give you excellent, clear vocal takes. It is specifically known for its strong ability to cope with frequency changes and dynamic range.
Additionally, the KSM42 also comes with a shock mount, pop filter, hard carrying case and even a soft velvet pouch. This bundle has a lot to offer for any home studio and will surely give you great vocal takes.
Key Specs
| Type: | Condenser |
| Diaphragm Size: | 1” (large) |
| Connection: | XLR |
| Color: | Grey |
| Warranty: | No |
| Special Features: | Dynamic range, onboard preamp |
| Accessories: | Shock mount, pop filter, carry case, soft pouch |
| Dimensions: | 14.5 in. W x 10.5 in. D x 6.25 in. H (368.3mm W x 266.7mm D x 158.75mm H) |
| Weight: | 3.17 lb (1.44 kg) |
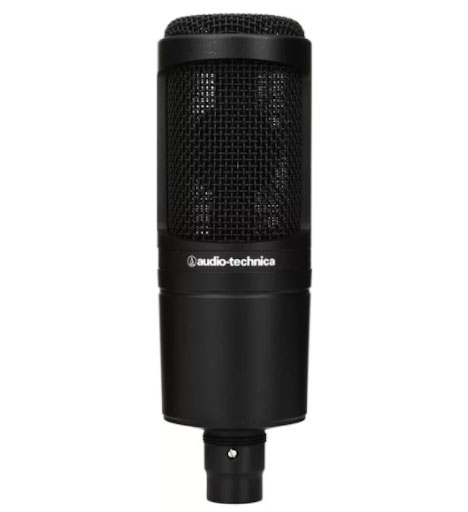
5. Audio-Technica AT2020 Medium-Diaphragm Condenser Microphone
Another highly respected name in the audio world, Audio Technica, has an excellent condenser microphone in the TA2020 that is at an absurdly low cost. This microphone is a perfect first mic for any home music producer. It is simply a handy and well-made mic that can be purchased for cheap.
It is a medium-diaphragm condenser microphone, which is normally either large or small. This is an attempt to create the best of both worlds in terms of frequency detection, meaning its goal is to be a jack-of-all-trades microphone. It does this effectively, without a doubt. It even comes with a stand mount as well.
Key Specs
| Type: | Condenser |
| Diaphragm Size: | .63” (medium) |
| Connection: | XLR |
| Color: | Black |
| Warranty: | No |
| Special Features: | Low cost, pivoting stand mount |
| Accessories: | Stand mount |
| Dimensions: | 9.6 in. W x 9.6 in. D x 2.6 in. H (243.84mm W x 243.84mm D x 66.04mm H) |
| Weight: | 1.32 lb (0.6 kg) |
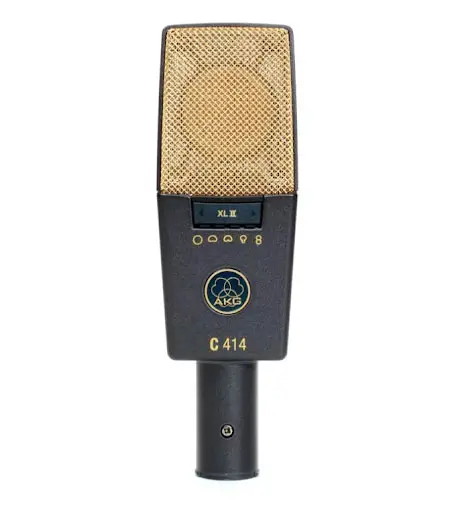
6. AKG C414 XLII Large-Diaphragm Condenser Microphone
The AKG C414 XLII is a very strong condenser microphone that sits at an intermediate price level. It is made extremely well and its signature feature is simply its massive amount of sound customization.
The microphone has nine different pattern settings, allowing you total control over your vocal sound. It also has an LED light on the face that tells you if you’re overloading your mic, which will lead to clipping.
The last main bonus of the C414 XLII is that it comes with a huge bundle, which includes a shock mount, stand mount, pop filter, windscreen and even a carrying case.
Key Specs
| Type: | Condenser |
| Diaphragm Size: | 1” (large) |
| Connection: | XLR |
| Color: | Black |
| Warranty: | No |
| Special Features: | Wide range of customization |
| Accessories: | Shock mount, stand mount, hard case, pop filter, windscreen |
| Dimensions: | 11.3 in. W x 9.6 in. D x 5.5 in. H (287.02mm W x 243.84mm D x 139.7mm H) |
| Weight: | 0.66 lb (0.29 kg) |
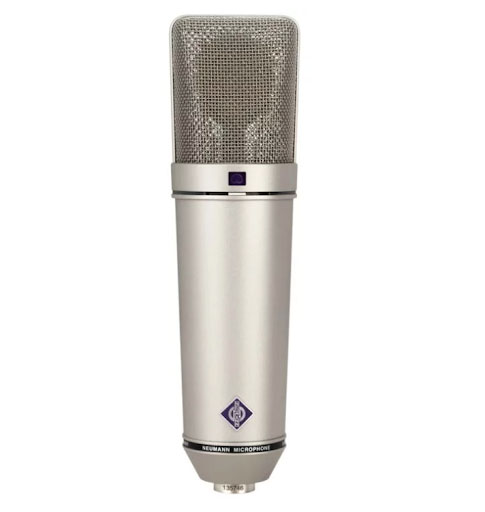
7. Neumann U 87 Ai Large-Diaphragm Condenser Microphone
The Neumann U87 was first introduced in 1967 and has quite literally been the studio industry standard for decades. It is so widespread and beloved that it is one of the most common microphones you’ll see in recording studios.
It is a straight-up, high-end microphone with little to no bells and whistles. All of its focus is on the microphone’s sound quality and it shows. The U87 is a phenomenal, tried and tested piece of gear that will only help you achieve excellent vocal takes.
As you would expect for a high-quality, professional grade mic, it is not cheap. However it does prove the age old adage correct: you get what you pay for.
Key Specs
| Type: | Condenser |
| Diaphragm Size: | 1” (large) |
| Connection: | XLR |
| Color: | Nickel |
| Warranty: | No |
| Special Features: | The classic studio microphone |
| Accessories: | Wood case |
| Dimensions: | 11.1 in. W x 11.1 in. D x 6 in. H (281.94mm W x 281.94mm D x 152.4mm H) |
| Weight: | 5.4 lb (2.45 kg) |
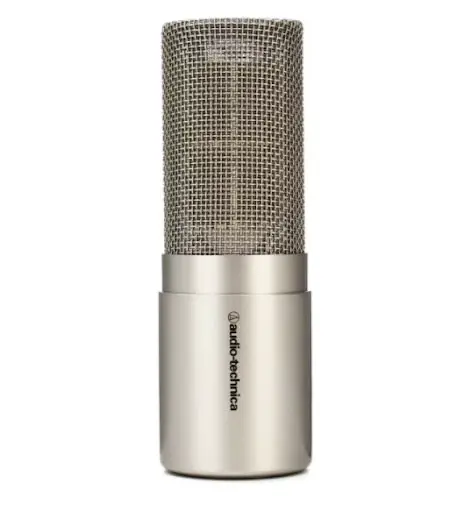
8. Audio Technica AT5047 Large-Diaphragm Condenser Microphone
A high-end microphone option from Audio Technica is the AT5047, the company’s flagship studio microphone. It boasts a sleek and beautiful design, with intricate electronic components that perform incredibly and limit noise. Each microphone is hand assembled as well and comes with a travel case and shock mount.
A unique aspect of the microphone’s construction is that the electronics are housed in an internal shock mount built inside the body of the microphone, drastically cutting down the noise. This helps give the AT5047 an incredible dynamic range at both high and low frequencies while allowing almost zero noise.
Key Specs
| Type: | Condenser |
| Diaphragm Size: | 1” (large) |
| Connection: | XLR |
| Color: | Silver |
| Warranty: | No |
| Special Features: | Designed to block noise from the sides and behind the mic |
| Accessories: | Hard case and shock mount |
| Dimensions: | 11.9 in. W x 11.9 in. D x 7.1 in. H (302.26mm W x 302.26mm D x 180.34mm H) |
| Weight: | 7.04 lb (3.19 kg) |
Tips For Recording Vocals
Now that you have the right microphone for your home recording studio, there are a few things to be aware of when it comes to actually recording. These are simple and easy tips to be aware of, but adhering to them will massively improve the quality of your vocal takes.
Microphone Placement
Once you have your room picked out and treated for reverb, where you physically place your microphone is key. The goal is to find the “sweet spot” of the room, an area that isn’t too dead but not too noisy either. This is achieved by NOT placing your mic in the center of the room, while also being as far from walls as possible.
The best way to do this is start in the middle of the room and then walk a few feet off center until you find your sweet spot. Each room is different so you’ll have to tweak your location and find it yourself.
The microphone’s height matters as well. You should try to avoid having the mic at lip-level. Raising the mic will emphasize higher-end frequencies, while lowering the mic closer to the vocalist’s chest will bring out more low-end. You want to adjust this based on your singer and what tone you are looking for in the recording.
Singer Placement
The vocalist’s location in proportion to the microphone is extremely important. The proximity effect is something to be aware of. It means that the closer you get to the microphone the louder and deeper your voice is, and as you get farther away it becomes lighter and airier.
The rule of thumb is that you want your mouth to be 6-8 inches away from the microphone. This will vary slightly depending on the mic, room and vocalist, but starting 6 inches away and adjusting from there is the way to begin.
Sibilance
Sibilance is the name for sounds in the human speech that are harsher. These are mainly sounds like “s, t, ch, th” and so on. A main way to mitigate this is by your vocalist’s placement. If the singer is having trouble with sibilance, then back off the mic. Being too close to the microphone will emphasize sibilance. Eight inches away from the mic is a good place to be if these sounds are prominent.
Another way to deal with this is to slightly angle the microphone. If the mic is completely straight and square to the vocalist’s mouth, then sibilance is far more likely to occur. Angling the axis a touch will cut down on this.
Pop Filters
Plosives, like sibilance, is a name for harsh sounds like “p or b.” When you sing those sounds, a percussive breath is launched into the mic, creating an unpleasant sound. Pop filters protect the microphone from this wave of air to avoid having that sound in the recording. Pop filters are integral to quality vocal recording and are a must for your microphone.
Warming Up
A common mistake that recording artists make, especially in home studios, is that they forget to warm up properly, if at all. The rule of thumb is that a good vocal warm-up should take just about 20 minutes. Too much more than that and you could strain your voice, as you could by not warming up for long enough.
Headphone Mix
When your vocalist is recording, it’s crucial that they have a good rough mix in their headphones to sing along to. This means having the rhythm section (drums and bass) prominent, while having guitars and keyboards turned down. The higher frequency instruments can interfere and distract the vocalist, so it is much better for them to sing with a pronounced rhythm section.
Comping
It is crucial that during your session, the vocalist records multiple takes. This is for editing them after they are recorded. If you have multiple good takes, you can easily comp, or replace, a section of vocals in your track with a section from a different track that you may prefer. You want to have the best possible final take, and that usually requires taking bits and pieces from several takes.
Processing
Once you have your comping and editing done with your vocal take, then you are ready to process your track! This entails EQ, compression and reverb, mainly. These are the most common and basic elements of sound mixing and are very straightforward. Aside from those, you can add delay, distortion and every other effect under the sun depending on what type of vocals you require.
Final Checklist
Now that you know what kind of microphone you should get and how to use it, you are ready to record your vocals! This is a checklist that covers the main points in this article and will help you make sure all your recording bases are covered.
- Choose the right room and treat it for reverb as best as you can
- Purchase the right kind of microphone (most likely a condenser, if it is for vocals)
- Make sure your microphone placement, height and angle are optimal, as well as the vocalist’s distance (6-8 inches) from the mic.
- Be aware of sibilance and plosives. Always use a pop filter.
- Use closed back headphones and a mix where the guitars and keys are turned down compared to the rhythm section.
- Warm up for at least 20 minutes but no more than 30.
- Record multiple good takes, to be able to comp them and make editing/processing easier.
