In this post, I’ll show you how to set up a contact form on your website using one of the most popular contact form plugins on WordPress, Contact Form 7. The plugin is fairly easy to use and setup but best of all, it’s free.
Here’s how to do it:
This post is part of a 14-step series on creating a website for your band using WordPress. Click here to go back to the main page.
How to Setup a Contact Form
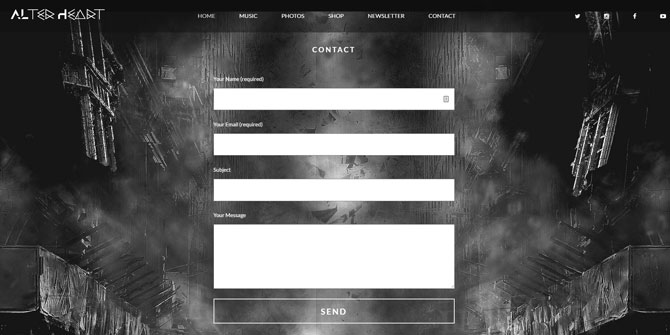
Contact Form 7 is free and fairly easy to use. Here’s an example of how I have it set up on my website, www.alterheart.com:
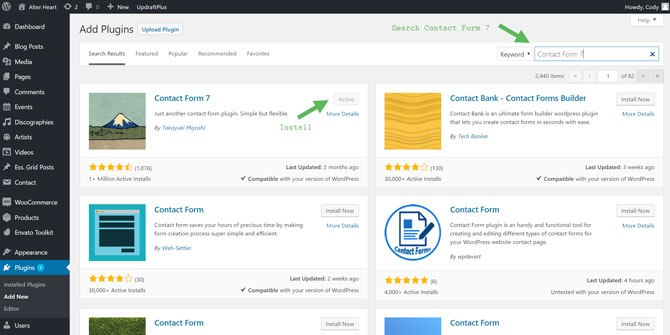
To use it, you’ll first need to install Contact Form 7 (if it’s not already installed). To install, go to “Plugins” then “Add New” in the WordPress left-hand side navigation. You’ll then be directed to the “Add Plugins” page. In the upper right-hand corner is a search box. Search for “Contact Form 7” then click “Install” on the result:

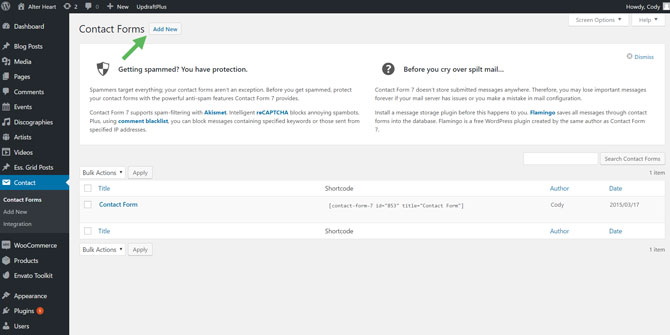
Once installed, click on the tab that says “Contact” in the left-hand navigation. You’ll then be brought to the “Contact Forms” page where you can see all of the contact forms you have created. Contact Form 7 may have already created one for you. You can choose to edit this form by clicking on the name or create a new one by clicking “Add New”:
Now, you should be on the edit page for your contact form:
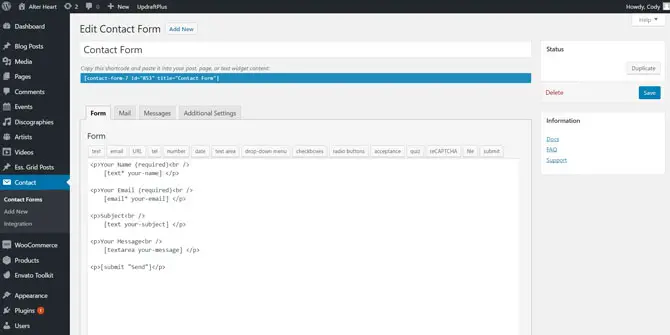
You can name the form in the input box at the top. You should also notice a few tabs below that. By default, you’ll be on the “Form” tab. You can use the box below that to include or exclude different form options. If this looks too complicated, just leave it alone. It will already be set up to ask for a name, email, subject, and message.
From there, you can move onto the “Mail” tab:
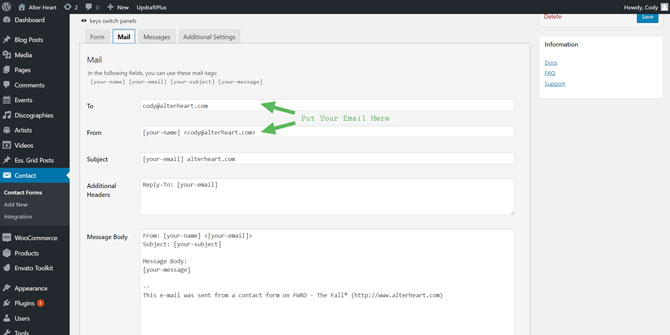
This area allows you to edit what is sent to your email (and which email) when someone submits your contact form. In the “To” input box, put your email. In the “From” input box” put [your-name] followed by your email. In the “Subject’ box put anything that lets you know this is a submission from the contact form on your website.
When someone submits an entry to your contact form, the email you receive will contain all of their inputs in the message body of the email (it will show their email, subject, message, etc.).
Scrolling further down, you’ll see a checkbox under “Mail (2)”:
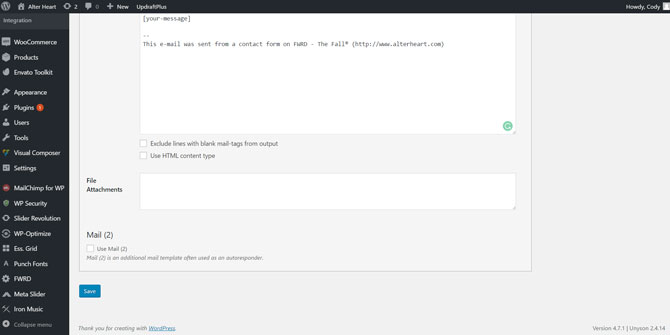
Checking this will allow you to create an autoresponder email when someone submits your form.
Next is the “Messages” tab:
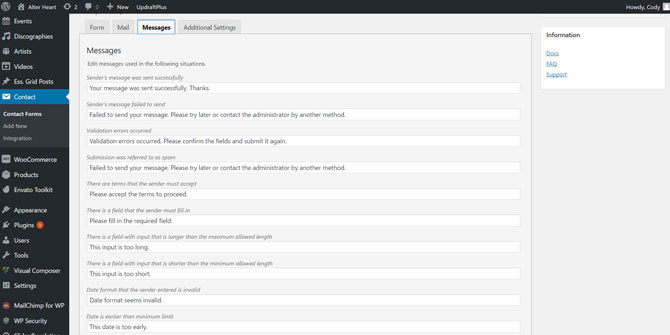
Here you can customize the display messages when someone completes an action on your contact form. For instance, you can change the confirmation message when they submit the form. You can also change the error message when someone tries to submit the form without their email.
Once you have everything set, scroll back up and save the form settings.
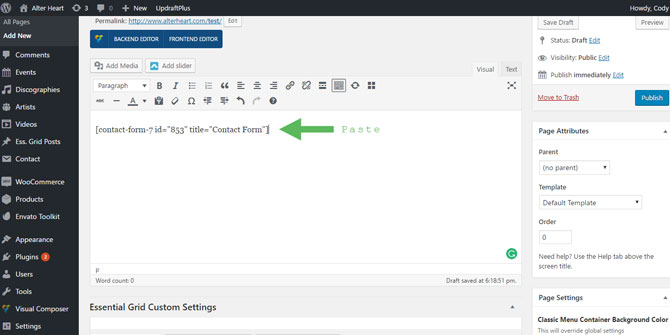
To add the form to a page, scroll back to the top of the contact form settings page and copy the shortcode (everything inside the brackets including the brackets) in the blue box:

You can also get this shortcode on the Contact Forms page (the one that lists all the contact forms you have created).
With that code copied, head over to the page you want to add the contact form to and paste it where you would like the form to appear:
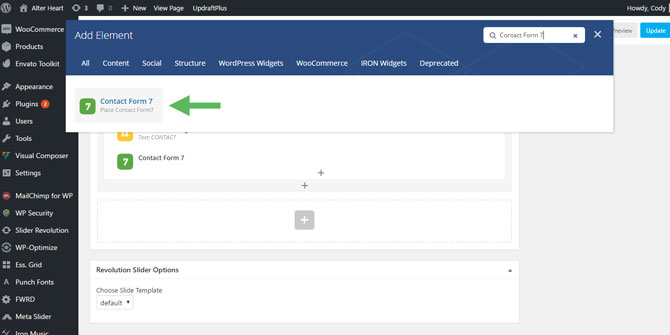
Then update the page and your form will now be present on the frontend of that page. Or, if you have the FWRD theme and you’re using the Visual Composer Page Builder, you can simply add the “Contact Form 7” element:
That’s all there is to it. Just copy and paste the code to a page or add the contact form using Visual Composer. If you have any questions, post them in the comments below.
Now, let’s move onto Step 13: Collecting Emails to Build Your List.
Or, click here to head back to the main page.
